Category Archive: Part Design
Plastic part design for injection molding requires several considerations to ensure that the part is moldable while reducing the risk of costly mistakes.
Part of the appeal of plastic injection molding is the ability to produce thousands to millions of uniform, high quality parts at low cost so you can optimize project profit margins. At the beginning of any plastic part design project, it’s important to review all design considerations to avoid problems and reduce the cost of parts. Even the smallest mistakes can affect tooling costs, increase part costs, and cause problems with molding performance.
Moldability guidelines for plastic parts recommend looking at the big picture of the plastic part design. It’s important to consider everything from materials that will be used to size to surface finishes to custom color matching needs.
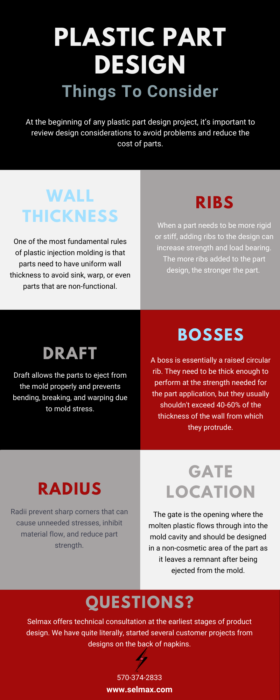
6 important considerations when designing plastic parts
1. Wall thickness
One of the most fundamental rules of plastic injection molding is that parts need to have uniform wall thickness to avoid sink, warp, or even parts that are non-functional. Designing proper wall thickness into the part will reduce the risk of cosmetic defects in the finished part. Walls should be within the recommended thickness ranges for the material that will be used. Walls that are too thick are susceptible to sink. If extra strength is needed, supporting ribs should be added instead.
2. Ribs
When a part needs to be more rigid or stiff, adding ribs into the design can increase strength and load bearing capabilities. It’s important to keep in mind that rib thickness should be less than the wall thickness, typically 40% to 60% of the adjacent wall. If a thick rib is needed, the center of the rib should be cored to allow for uniform wall thickness.
3. Draft
Applying draft to the faces of the plastic part is essential for ensuring the part is moldable. Technically speaking, draft is the angle in which the part is tapered to allow it to release from the mold. Draft is designed into every plastic injection molded part in the direction of mold movement. It allows the parts to eject from the mold properly and prevents bending, breaking, and warping due to mold stress.
4. Bosses
A boss is a raised circular rib that is typically designed into the part to help with assembly, as a receptacle for a screw or a pin from another part. While bosses need to be thick enough to perform at the strength needed, they usually shouldn’t exceed 40-60% of the thickness of the wall from which they protrude. If your part requires more strength than that would provide, it’s better to surround the boss with gussets to strengthen its walls.
If the boss is placed close to a vertical wall, it should be anchored with one or two ribs to prevent unnecessary thickness that can result in sink. It’s also important to design draft into each boss to facilitate ejection. Sometimes, shorts or burns may form on the rim of the boss if vent pins aren’t added to allow for trapped gasses to escape during the mold filling process.
5. Radius
Sharp corners don’t typically mesh well with plastic injection molding. A radius can prevent a sharp corner that would otherwise cause unneeded stresses, inhibit material flow, and reduce part strength. Radii should be designed with material selection and end part use in mind.
6. Gate location
The gate is the opening where the molten plastic flows through into the mold cavity. This area can leave behind a remnant that may need to be trimmed by hand after it ejects from the mold. Depending on the style of gate, the plastic used, and the part geometry, the gate should usually be designed into a non-cosmetic area of the part. It is critical to consider gate location in the design phase because it can ultimately make or break the project. Choosing the right type of gate and location can also affect many other areas of the project.
Other Considerations for Plastic Part Design
It’s always best to work with a seasoned injection molder when designing your plastic parts, especially when they are complex or need to pass specific performance tests.
Some common questions a design engineer will ask:
- How will the part be used? Is it a single product or a component of a bigger assembly?
- What are the dimensional and tensile requirements?
- Does the part need to withstand certain elements, pressure, or chemicals?
Spending time and effort on designing the perfect part now can save substantial time and money over the long term.
________________________________________________________________________________________
Selmax offers technical consultation at the earliest stages of product design. We have quite literally started several customer projects from designs scribbled on napkins.
We work closely with our customers to define the requirements of the finished product – physical dimensions, structural supports, custom engraving, color, texture and finishing.
Since 1971, we’ve been providing our customers turnkey solutions from design to delivery. Ready to discover the low-stress experience of working with a full-service manufacturer?
Save this graphic for future reference
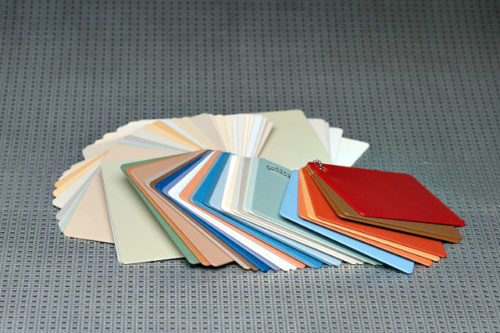
Did you ever wonder how plastic parts get their color? At Selmax Corporation, we specialize in precise color matches to ensure that all parts produced are the right color. We work with some of the most experienced colorant suppliers in the country to achieve the best results every time.
The Color Matching Process
To pinpoint the desired color for each plastic product or part, a color matching process must be completed which allows engineers to develop a specific color concentrate for a particular material and application. We can typically match a color from a chip, plaque, or Pantone color number.
There are a variety of things that must be considered for each polymer being colored, including viscosity and melt temperatures. Our color houses can match colors in any polymer system, including ABS, nylon, polypropylene, polyethylene, PVC, and acrylics, just to name a few.
We use advanced spectrophotometer technology to measure and formulate colors. These formulations are stored electronically in our color matching system. We also store the physical chips produced during the color matching process.
The Production Process
Successful plastic coloring depends upon close attention to the smallest details and adherence to unique requirements. A knowledge of end-use application and the material of the end product are a good starting point for formulating the perfect part with long-lasting color. However, there are many variables that must be considered with each project.
Plastics are colored using various coloring systems and each one offers its own unique properties, benefits, and drawbacks. Masterbatches, “salt and pepper” blending, liquid color, and pre-colored resins are four of the most common coloring techniques.
To color the injection-molded products we make at Selmax Corporation, we purchase “natural” polymers, such as ABS, Nylon, or Polypropylene in pellet form. We then mix color concentrates using a precision gravimetric blending unit to dispense the precise amount of colorant needed immediately before the part is molded. During production we use advanced spectrophotometer technology to ensure the final plastic product is the exact right color.
Learn More
Selmax Corporation is a full-service plastic injection molder. We pride ourselves on providing injection molding solutions, not just parts. We’ve been successfully helping our clients manufacture the perfect plastic part since 1971. If you have a project that has meticulous color requirements, we’d love to talk to you. Send us an RFQ, call (570.374.2833), or reach out via email at info@selmax.com.
Injection molding is a great option for manufacturing high-quality plastic parts of different shapes, sizes, and colors. It is efficient and cost-effective, making it the most popular option in most cases. This is especially true when there are high volumes of parts to produce.
Being prepared before you reach out to an injection molder will help to expedite your project timeline. It will also prepare you for cost, time to production, and other components of the project that you may not have considered.
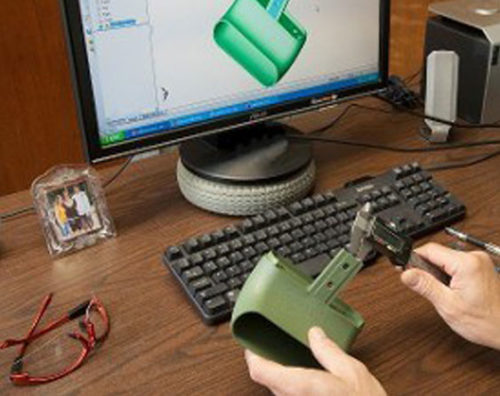
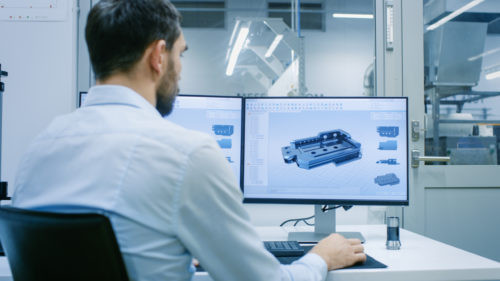
Do you have CAD drawings of the part you’d like to produce?
Plastic injection molders need detailed dimensional drawings that provide information about the size and complexity of the part. 3D CAD model files are the best. The injection molder will evaluate the CAD drawings and advise on the best design for manufacturability.
If you don’t have a CAD model, that’s ok. Typically, injection molders can work with you to develop it. Just plan to spend some time and project budget on developing a good manufacturable design…it will pay off in the long run.
What material is the part to be made from?
In many cases the plastic material is known. In others, it needs to be determined. An injection molder will need to know how the part is going to be used, the type of environment it will be used in, and what wear and tear it will experience over time. When they have these answers, they will be able to recommend options for resins and additives that will give you the best performance and durability for your part within the project budget.
How many parts do you plan to produce?
The injection molder will need to know how many parts you need produced and on what frequency over the life of the project. This will determine the material the injection mold should be constructed from and the number of mold cavities it must have to achieve your required production levels.
Do you need prototype parts to work out potential design issues?
Some parts are simple and straightforward. Others are more complex. Prototyping using 3D printing, for example, is an excellent way to reduce the technical risk for a new injection molding project. It is much easier, and less costly, to discover a design issue and fix it before you’ve made the sizable investment in an injection mold.
What is your budget for the project?
Plan to spend the largest portion of your budget on the injection molds. A large up-front investment is to be expected. It is designed to be recovered over the long-term manufacturing of thousands or millions of parts.
Mold costs will vary from one project to another depending on tolerances, number of cavities, and estimated production life. If you’re projecting to run millions of parts over several years, you will likely opt to spend more on a high quality mold with a high number of cavities. This will translate into lower maintenance costs and lower price-per-part over time.
On the other hand, if you have thousands of parts to run in a relatively short amount of time, you may opt for a lower quality tool with less cavities. The mold costs will be lower, but the part price will be higher. Additionally, if you extend the production life beyond what you originally planned, you can expect high maintenance and repair costs over time.
Next Steps.
If you’re ready to get started, consider working with a turn-key manufacturer. They will be able to handle every step of the process from design to distribution. This allows for better communication, shorter lead times, and a smooth process from start to finish.
For over 45 years, Selmax Corporation has been implementing our unique manufacturing model to create high quality parts for a variety of applications. We work closely with our clients to produce top-of-the-line products for their respective industries.
We pride ourselves in taking on an assortment of projects, from product design and prototyping to distribution. From small production runs to projects with annual volumes of over one million parts, we can assist nearly anyone looking for a quality injection molder.
To learn more about our services, feel free to contact us here!
If you already have everything ready to go, send us an RFQ!