


Mold Tooling Transfer 101: Planning Your Inventory
Comments Off on Mold Tooling Transfer 101: Planning Your Inventory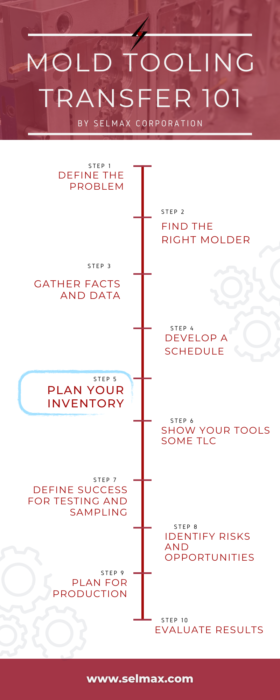
An important part of the mold tooling transfer process is planning to produce enough inventory to ensure there are no supply chain interruptions as you move your mold(s) from one molder to another.
Six Weeks (Or More) In Inventory
A good rule of thumb is to be sure to have six weeks of safety stock on hand before the transfer process begins. However, this figure can vary, depending upon your company’s unique needs, the complexity of the mold(s) being transferred, and the current conditions of the mold(s).
This is why it is important to see the molds operating at the current molder, if possible, before sending them to a new location. You will get a firsthand look at their condition and can note any issues or special processing requirements the current machine operators need to satisfy in order to produce acceptable parts.
Some companies take the opportunity during the transfer process to evaluate their current product and make notes of any changes they’d like to see or slight improvements in the design.
If your mold(s) needs significant maintenance or modification, you should plan to add 4-6 weeks of inventory, as a rule of thumb. The new molder will need adequate time to do the necessary maintenance or modifications before starting the production run, so it’s always better to be safe by adding a longer safety stock cushion.
Mold Transfer Hesitations?
There is a common fear of transferring mold tooling to a new supplier due to potential delays in production, which can severely hurt a business.
Here are a few ways to mitigate this risk:
- Be sure to have a robust insurance policy in place that will cover any in-transit damages to the mold.
- Be sure to plan enough inventory to tide you over in the interim.
- Gather as much information as possible in the beginning stages to provide the new molder with any important/unique processing information that could help them seamlessly take over production of your product.
Many times, fear of the unknown variables will keep a company from transferring their tooling from a subpar molder to one with better quality, support, or even location. As long as you are well-prepared, the benefits often far outweigh the associated risks.
Transferring Your Mold To Selmax Corporation
Selmax has years of experience helping customers transfer their production molds from other injection molders (or in house operations) to Selmax for their ongoing production needs. We have experience with both domestic and international “re-shoring” transfers.
Production molds and tooling are often the single largest investment in a plastic injection molding project and Selmax can help customers maximize the return on their investment.
Each tooling transfer project is assigned a Selmax Project Manager (PM) as the customer’s primary point of contact. The PM works with the customer through each phase of the mold transfer process and coordinates all the necessary activities with Selmax Logistics, Tooling Technicians/Machinist, Process Technicians, and Quality Assurance to ensure a smooth tooling transfer and an uninterrupted supply chain.
The basic steps in the tooling transfer process include:
- Pre-transfer assessment – to collect all available information/documentation on the tooling, materials and processing to ensure a match with Selmax capabilities. This includes budgetary cost and schedule estimates.
- Tooling receipt, inspection and assessment – to evaluate any maintenance or repairs needed on molds and associated gauges, fixtures, or post-processing equipment.
- Part Qualification – to produce sample parts for comparison to customer provided “golden samples” and provide parts for customer approval to validate the parts produced at Selmax satisfy customer requirements.
- Production – Upon customer approval of the samples parts, begin production runs with Selmax.
Ready to start the transfer process? Contact us today!
More in this series:
Step 2: Finding the Right Molder
Step 3: Gathering Facts and Data
Step 6: Showing Your Tools Some TLC
Step 7: Defining Success for Testing and Sampling
Step 8: Identifying Risks and Opportunities
Step 9: Planning for Production
Step 10: Evaluating Results