Category Archive: Mold Transfers
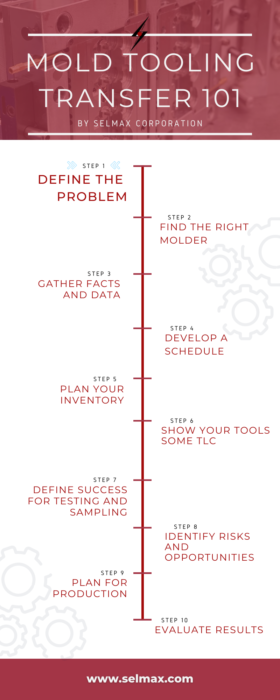
Mold Tooling Transfer 101: Identifying Risks and Opportunities
From the information-gathering stage through the process of setting up at a new molder, your current molds, processes, and products will be dissected and closely examined. Following these steps in of the mold tooling transfer process can often reveal potential risks in a plastic injection molding project that may have not been previous identified. However, the process can also help identify opportunities to make improvements, cut costs, and even extend the life of your mold(s).
Risk Mitigation
Every business makes decisions based on the amount of risk they’re willing to take. In a perfect world, there would be no risk to consider, but that’s just not the reality.
There are a few different types of risks that can be highlighted throughout the mold transfer process:
- Tooling. Molds often represent the single largest investment in an injection molding project. Mold condition and operability directly affect part quality, reject rate, and operational efficiency. Regularly scheduled maintenance and timely repairs will help keep them running smoothly over the long haul. Even things a simple as mold storage preparation and environment can impact the life of the mold. They new molder should provide a thorough assessment of the transferred mold and identify any potential issues that need to be addressed.
- Operations. Sometimes the mold transfer process will show weaknesses in current operations. This could be related to the part quality, processing setup, cooling times, or something else that affects the final part, cycle times, material usage, etc.
- Part quality. During the mold testing process at the new molder, you might find that your existing parts are out of tolerance. This is a great time to re-evaluate your parts and ensure they’re functioning well for their intended use. You might also discover that you’re missing drawings or documentation for your molds or parts during this process.
- Supply chain. The mold transfer process can also highlight raw materials risks that you might not have been aware of previously. Ensuring your supply chain is strong and potential materials shortages (or availability of alternate materials) are planned for is an important part of risk management in plastic injection molding.
Many companies have thousands or hundreds of thousands of dollars tied up in their plastic injection molding projects. That’s why it’s so important to have a solid risk management plan in place to be prepared for anything from natural disasters, supply chain disruptions, and equipment failures that could interrupt your production.
To keep operations running smoothly, decision-makers in the organization should have a good understanding of risks that could potentially impact operations and how to mitigate those risks to protect their assets and their brand.
The COVID-19 pandemic demonstrated just how fragile supply chains can be when “normal” operations are interrupted. Global supply chains are still trying to rebound from the effects of the pandemic and most companies have developed risk management plans for similar situations in the future.
The mold transfer process is not just a time to identify areas of weakness, but also to discover new opportunities for improvement, cost reduction, and quality enhancement.
Opportunity Capture
Continuous improvement should always be included in any business strategy. The mold transfer process is a great time to identify opportunities for improvement. You might want to implement a new maintenance plan for your mold(s), make changes to your process that cuts costs, or tweak the operations to produce a higher-quality product.
Some opportunities that could be discovered through the mold transfer process are:
- Process improvement for part quality enhancement
- Cost reduction
- Cycle time optimization
If you are moving your molds closer to your company, you could also find that shipping times are much quicker, enabling you to deliver products to your end customers faster. In addition, if your previous molder struggled with the machine time to get your molds into a press, you might find that the new molder can produce parts for you with drastically shorter lead times.
Whatever your reason for moving your molds, you should take the opportunity to identify risks and opportunities that will strengthen your business plan and mitigate issues that could cost money, time, and your brand’s reputation.
Let’s Get Started
Ready to start the mold transfer process? Let’s chat.
More in this series:
Step 1: Defining the Problem
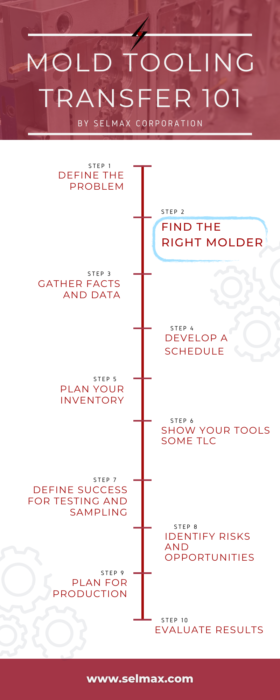
Step 2: Finding the Right Molder
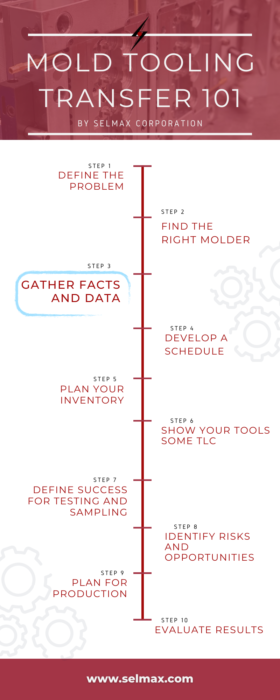
Step 3: Gathering Facts and Data
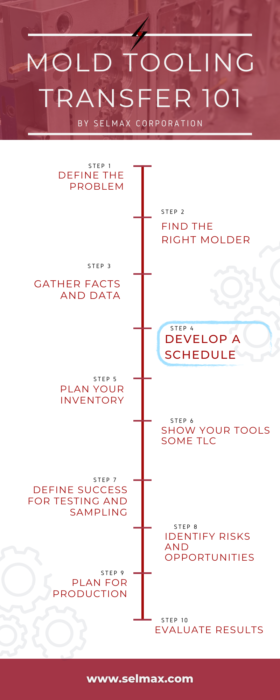
Step 4: Developing a Schedule
Step 5: Planning Your Inventory
Step 6: Showing Your Tools Some TLC
Step 7: Defining Success for Testing and Sampling
Step 9: Planning for Production
Step 10: Evaluating Results
After a mold has been transferred to a new molder, has gone through cleaning and inspection, any tooling issues resolved, and is ready to start running the first samples, it is important to define success for mold testing and sampling.
Defining Objective Criteria
The easy part is to define success with things that can be measured – critical part dimensions within tolerance, part weight, numerical color results (using a spectrophotometer) within tolerance, etc. Part design artifacts (drawings, 3D Solid Models) are critical to this step.
Defining Subjective Criteria
The harder part is to define success with characteristics that are more subjective. The appearance of flow lines, sink, weld lines, flash, and other cosmetic attributes are difficult to quantify. So, to make this evaluation easier a “Golden Part” sample is often used as a reference for comparison.
What Is A Golden Part Sample and How Is It Used?
A Golden Part Sample(s) is a previously produced part from the mold, prior to transfer, that represents the minimum quality standards you will accept in the finished product. This sample is used by the manufacturer for quality control as samples from each shot will be compared to it. The golden sample ensures that the new molder can provide the same quality results consistently. Having this part will help them qualify your molds and capture the best process setup to produce parts that match the golden sample in quality, color, cosmetics, etc.
Choosing The Golden Sample For Mold Testing
The best Golden Part Sample should be from the original mold qualification testing when the mold was approved for production. If you mold has seen a lot of cycles. A “last shot” sample from the most recent production run can also be used in conjunction with the Golden Part Sample to identify potential wear, damage or end-of-life issues with the mold. Make sure the samples you provide to the new molder have been reviewed to ensure there are no unexpected flaws that would be considered unacceptable.
What If A Golden Part Sample Is Not Available?
If you don’t have a Golden Part Sample to supply to the new molder, that’s ok. It will likely just take a little more time/effort for the mold qualification phase. You will want to review the samples produced by the new molder and agree on a what will be established as the Golden Part Sample for the new molder to use in QC of future production. These samples should be clearly identified, signed, dated, and sealed so that they do not get lost in the mix during the mold testing process.
Ready to start the mold transfer process? Get in touch with us to get started today.
More in this series:
Step 1: Defining the Problem
Step 2: Finding the Right Molder
Step 3: Gathering Facts and Data
Step 4: Developing a Schedule
Step 5: Planning Your Inventory
Step 6: Showing Your Tools Some TLC
Step 8: Identifying Risks and Opportunities
Step 9: Planning for Production
Step 10: Evaluating Results
Mold maintenance is often brought to center stage during the plastic injection mold transfer process. By the time a company makes the decision to transfer to a new molder, they’ve probably already put some ‘miles’ on the mold.
Depending upon the degree of wear and tear, the maintenance or modifications required to get the molds up and running at full capacity may take more time than originally planned. Molds that are in fair to poor condition may require more time on the bench before they’re ready to produce the first article inspection run.
That is why it is so important to ensure that your current molder is showing your tools TLC on a regular basis. Maintaining the molds in top condition is the single best thing that can be done to ensure they get the longest use possible. Regardless of volumes, they should have regularly-scheduled down time to be evaluated, cleaned, and repaired (if needed).
Extending Life With Mold Maintenance
Keeping molds in tip-top shape will keep them running smoothly and creating consistently good parts over the life of the mold.
A quality molder typically follows this process for the molds in their care:
- Remove the mold from the press.
- Clean all mold faces with mold cleaner, a clean rag, and/or compressed air.
- Clear all water lines with compressed air.
- Remove all plastic or molding residues.
- Check for scratches, chips, cracked cavities, broken cores, core pins, ejector pins, broken leader pins and bushings and warped or burred plates.
- Grease all slides, cam pins, leader pins or other moving parts
- Apply a generous coating of rust preventative.
- Return the mold to storage.
When it comes to mold maintenance, it’s important to take the time to do each of these steps properly. The care, inspection, and cleaning are directly tied to mold’s length of life. With molds typically being the largest investment in a plastic injection molding project, it’s important to find a molder that will go to great lengths to protect your investment and help you extend the life of your mold(s).
If your molds have been kept in excellent working condition by your current molder, the transfer process should be smooth and simple.
Are You Considering Transferring Your Mold(s)?
Selmax has decades of experience managing mold transfer projects. Over the years, we have refined the process and pride ourselves in being quick on our feet when it comes to handling any obstacles that arise during the process. We can expertly guide you through each step of the process to make your mold transfer quick, efficient, and smooth.
Ready to start the mold transfer process? Let’s chat.
More in this series:
Step 1: Defining the Problem
Step 2: Finding the Right Molder
Step 3: Gathering Facts and Data
Step 4: Developing a Schedule
Step 5: Planning Your Inventory
Step 7: Defining Success for Testing and Sampling
Step 8: Identifying Risks and Opportunities
Step 9: Planning for Production
Step 10: Evaluating Results
An important part of the mold tooling transfer process is planning to produce enough inventory to ensure there are no supply chain interruptions as you move your mold(s) from one molder to another.
Six Weeks (Or More) In Inventory
A good rule of thumb is to be sure to have six weeks of safety stock on hand before the transfer process begins. However, this figure can vary, depending upon your company’s unique needs, the complexity of the mold(s) being transferred, and the current conditions of the mold(s).
This is why it is important to see the molds operating at the current molder, if possible, before sending them to a new location. You will get a firsthand look at their condition and can note any issues or special processing requirements the current machine operators need to satisfy in order to produce acceptable parts.
Some companies take the opportunity during the transfer process to evaluate their current product and make notes of any changes they’d like to see or slight improvements in the design.
If your mold(s) needs significant maintenance or modification, you should plan to add 4-6 weeks of inventory, as a rule of thumb. The new molder will need adequate time to do the necessary maintenance or modifications before starting the production run, so it’s always better to be safe by adding a longer safety stock cushion.
Mold Transfer Hesitations?
There is a common fear of transferring mold tooling to a new supplier due to potential delays in production, which can severely hurt a business.
Here are a few ways to mitigate this risk:
- Be sure to have a robust insurance policy in place that will cover any in-transit damages to the mold.
- Be sure to plan enough inventory to tide you over in the interim.
- Gather as much information as possible in the beginning stages to provide the new molder with any important/unique processing information that could help them seamlessly take over production of your product.
Many times, fear of the unknown variables will keep a company from transferring their tooling from a subpar molder to one with better quality, support, or even location. As long as you are well-prepared, the benefits often far outweigh the associated risks.
Transferring Your Mold To Selmax Corporation
Selmax has years of experience helping customers transfer their production molds from other injection molders (or in house operations) to Selmax for their ongoing production needs. We have experience with both domestic and international “re-shoring” transfers.
Production molds and tooling are often the single largest investment in a plastic injection molding project and Selmax can help customers maximize the return on their investment.
Each tooling transfer project is assigned a Selmax Project Manager (PM) as the customer’s primary point of contact. The PM works with the customer through each phase of the mold transfer process and coordinates all the necessary activities with Selmax Logistics, Tooling Technicians/Machinist, Process Technicians, and Quality Assurance to ensure a smooth tooling transfer and an uninterrupted supply chain.
The basic steps in the tooling transfer process include:
- Pre-transfer assessment – to collect all available information/documentation on the tooling, materials and processing to ensure a match with Selmax capabilities. This includes budgetary cost and schedule estimates.
- Tooling receipt, inspection and assessment – to evaluate any maintenance or repairs needed on molds and associated gauges, fixtures, or post-processing equipment.
- Part Qualification – to produce sample parts for comparison to customer provided “golden samples” and provide parts for customer approval to validate the parts produced at Selmax satisfy customer requirements.
- Production – Upon customer approval of the samples parts, begin production runs with Selmax.
Ready to start the transfer process? Contact us today!
More in this series:
Step 1: Defining the Problem
Step 2: Finding the Right Molder
Step 3: Gathering Facts and Data
Step 4: Developing a Schedule
Step 6: Showing Your Tools Some TLC
Step 7: Defining Success for Testing and Sampling
Step 8: Identifying Risks and Opportunities
Step 9: Planning for Production
Step 10: Evaluating Results
Developing a schedule is the next step in the mold transfer process. At this stage, you have already defined the problem, found the right molder, and gathered all the important facts and data.
Based on the data gathered from the current molder, you can now begin to work with your new molder to develop a sensible transfer schedule. Under perfect conditions, your transfer process will go something like this:
- You’re able to obtain up-to-date mold and part drawings to provide to the new molder.
- The mold has been well-maintained and is running at full cavitation at the current molder.
- Mold qualification records are available and provided to the new molder.
- You have a “Golden Sample” to provide to the new molder that is in spec.
- You have ample inventory built as safety stock to sustain you during the transfer process.
- You’ll be able to talk or meet with the machine operator and/or process technician at the current molder to learn the setup and techniques they used.
- You will get all support equipment, tools, fixtures or jigs used in conjunction with running your parts. If these are not available, a list and photographs of these items should be provided to the new molder.
- The current molder will thoroughly clean the mold and coat it with rust preventive before sending.
- Raw materials will be ordered and waiting at your new molder before the mold is scheduled to arrive.
- The current molder will efficiently pack up and ship the mold to your new molder.
- The mold will arrive at the new molder where it will be opened, inspected, and cleaned.
- The new molder will install it into a press, set up the correct parameters, and begin the testing process.
- First-article parts will be collected and given to QA. Upon the new molder’s QA approval, the parts will be shipped to you for inspection and approval before production is scheduled.
When it comes to mold transfers, expect the best but plan for the worst.

When everything goes smoothly, the process is fairly routine. However, things don’t always go according to plan, so it’s important to be prepared for the wrenches that will inevitably be thrown into the schedule.
- Sometimes the tool hasn’t been properly maintained, is damaged or completely defunct upon arrival.
- Sometimes critical processing information is not passed along from the previous molder to the new molder.
- Sometimes support equipment wasn’t mentioned, so the new molder has to learn the nuances of the project by trial and error until the perfect part is achieved.
Regardless of how detailed your instructions are from the previous molder, you should always allow time for these possibilities when developing your mold tooling transfer schedule.
Be sure to gather the most important information that will be most likely to affect the transfer schedule. Things such as confirming that the mold is currently running at full cavitation, ruling out any special features the mold might have, and confirming tool validation requirements can help keep your schedule on track and eliminate the risk of surprises.
Ready to Start the Mold Transfer Process?
Selmax Corporation is a full-service plastic injection molder that specializes in mold transfers. We have been helping our customers efficiently make high-quality parts for over 50 years.
Take the first step today.
Request a Quote
More in this series:
Step 1: Defining the Problem
Step 2: Finding the Right Molder
Step 3: Gathering Facts and Data
Step 5: Planning Your Inventory
Step 6: Showing Your Tools Some TLC
Step 7: Defining Success for Testing and Sampling
Step 8: Identifying Risks and Opportunities
Step 9: Planning for Production
Step 10: Evaluating Results
You’ve found the ideal plastic injection molder for your tooling transfer(s). Now it’s time to start gathering information. This stage is important and should be handled carefully and tactically.
Identify Key Players
At this stage, it’s important to identify the key players in the mold transfer process. They are:
- Project manager. This person is responsible for overseeing each step of the process and typically has a high-level of technical skill and experience.
- Tooling technician. Senior-level expert responsible for evaluating the molds and creating the documentation required to make improvements to ensure qualified products will be molded according to expectations.
- Quality. Specialist responsible for evaluating parts, gauges and fixtures, and creates metrology instructions and inspection reports, etc.
- Process technician. The Process Tech and team qualify the transferred mold(s) in one or more presses and fine tune the process to ensure an efficient process window in the new environment.
Establish a strong relationship with the project manager at the new molder. Get a list of any information they might need to make the transfer process more efficient.
Gather Existing Data
Find and review the contract with your current molder and have it ready to reference.
Now is the time to identify and compile any available 3D CAD files and 2D prints for the part and mold design along with material specifications, injection molding processing parameters, and applicable quality control requirements. Your new molder will use these to get an accurate quote and develop the best plan for your mold test and qualification.
If you cannot locate these items or they don’t exist, you will need to discuss the risks and implications with the project manager. You may need to add some cushion to your timeline to account for the extra time needed to test the molds, finesse the process, and produce acceptable parts.
Visit the Current Molder
When possible, it can be invaluable to visit the current molder to observe your mold running. Often, experienced operators will have specific shortcuts, tips, or tweaks to make the mold run more efficiently. Take notes because this information is integral in a successful mold transfer process. Having this information helps the new molder get set up and running quality parts faster.
Take Necessary Precautions
It is always good to be extra careful when you’re planning a tooling transfer. It’s wise to wait as long as possible to tell your current molder that you plan to move your molds. Especially if the molds are being run overseas, some molders may lose motivation to act in your best interest after learning that they’re losing your business. It is better to have everything in place at the new supplier before notifying your current molder.
It should be noted that transferring your tooling can be a great opportunity to calibrate your processes and get a third-party evaluation on the condition of the mold and quality of the parts being produced.
Ready to Start the Transfer Process?
Selmax Corporation is a full-service plastic injection molder that specializes in mold transfers. We have been helping our customers produce high-quality parts for over 50 years.
Take the first step today.
More in this series:
Step 1: Defining the Problem
Step 2: Finding the Right Molder
Step 4: Developing a Schedule
Step 5: Planning Your Inventory
Step 6: Showing Your Tools Some TLC
Step 7: Defining Success for Testing and Sampling
Step 8: Identifying Risks and Opportunities
Step 9: Planning for Production
Step 10: Evaluating Results
After you’ve identified the problems and risks with your current supplier and decided you want to initiate a mold tooling transfer, it’s time to begin the search for a plastic injection molder that better aligns with your needs. Depending on your goals, some things may hold higher priority for you than others.
Here are some criteria to use that can help you quickly narrow down your search to find the right molder for your mold tooling transfer:
Machine Capabilities & Capacity
You’ll need to be sure that your new molder has the machine size and capacity available to handle your molds and the production volumes you’ll need to make each year. Be sure to provide prospective molders with your mold size, part size, and annual production numbers to set clear expectations from the start.
Industry Expertise
Another consideration for potential molders is their previous experience in your industry. This is especially important for industries, such as food/beverage, that require certain food-safe materials, or medical, that require special manufacturing considerations and certifications.
If the molder has not worked with your industry in the past, are they knowledgeable and capable of producing your parts to the standards you require?
In-House Tool Maintenance
Your new molder should have an in-house machine shop to properly care for and maintain your molds for the life of your project. If you’re transferring in molds with a lot of cycles on them, this will be especially important as they may need some TLC before they’re ready to run smoothly.
Material Sourcing and Handling
Does your prospective molder have a good relationship with high-quality raw materials suppliers? Are they able to get the exact materials you need in the quantities you need for your project? This is especially important in volatile times when the forces of supply and demand impact material availably and pricing. A good molder has built relationships with these suppliers over many years and may have an advantage in the marketplace.
Reputation and Experience
Be sure to check out your prospective molder’s reputation before committing to a tooling transfer. Ask them about their experience with mold tooling transfers in the past. Ask them to outline their process for transfers and what they do to mitigate risk and downtime.
Look for reviews on Google, check out their website, and find out how many years they’ve been in business.
Certifications
What certifications does the plastic injection molder have? Are they ISO 9001:2015 certified? You should also check to see if they’re members of industry associations, such as MAPP (Manufacturers Association for Plastic Processors).
Level of Support
Many molders may meet all your criteria for capacity, size, and manufacturing capabilities. However, it is also important to set an expectation for the level of support that will be provided throughout the life of your project.
Finding an injection molder that can work closely with you through each stage of the transfer process could be invaluable to your project. Having a seasoned consultant to help guide you through the process can save time and money and ensure that your mold transfer process is seamless.
Competitive Pricing
It’s important to ensure that your new molder has competitive pricing over the long run. However, the obvious prices, such as mold setup fees or part price are not the only way to determine the pricing structure. You should also look for hidden costs and risks that could end up amounting to more money over time.
For example, materials could be wasted producing low-quality parts, long lead times could interrupt your supply chain, or communication issues could result in parts that aren’t up to your standards.
Other Considerations
There are other things to take into consideration when choosing a new plastic injection molder for your project. Depending on the level of support you require, someone that is local or easily accessible may be important so you can meet in-person without too much hassle.
If your project requires after-ops processes such as assembly, sonic welding, or special packaging, these would all be important to discuss with your potential molder to be sure that they offer those services.
Another consideration is delivery requirements. If you have stringent delivery demands, it will be important to ensure that your chosen molder can meet or exceed your expectations. Make sure they’re well-established with trusted carriers and have the ability and experience to ship internationally, if needed.
Selmax Capabilities
With over 50 years of experience, Selmax Corporation takes great pride in meeting the most stringent material, color, and delivery requirements. Located in Selinsgrove, Pennsylvania, Selmax is within 4 hours of NYC, Philadelphia, Pittsburgh, Baltimore, and Washington D.C. and serves customers worldwide.
We offer services from concept to delivery, including design, 3D printing, mold making, production, assembly, packaging, and even short-term warehousing.
We also offer a high level of support throughout the process to make your mold transfer as seamless as possible.
More in this series:
Step 1: Defining the Problem
Step 3: Gathering Facts and Data
Step 4: Developing a Schedule
Step 5: Planning Your Inventory
Step 6: Showing Your Tools Some TLC
Step 7: Defining Success for Testing and Sampling
Step 8: Identifying Risks and Opportunities
Step 9: Planning for Production
Step 10: Evaluating Results
Mold Tooling Transfer 101: Defining the Problem
With the events of 2020 exposing cracks and weaknesses in many supply chains, many companies are conducting mold tooling transfers to mitigate risk. If you have wondered if it’s time to transfer to a new supplier, maybe some of the following statements apply to you:
- I may need to establish a domestic supplier for my injection molding.
- I should probably move my injection mold tooling to a more stable supplier.
- My current injection molder may be a weak link in my supply chain.
- I feel like I’m just buying parts; not solutions to solve problems or take advantage of new opportunities.
- It seems like my business is no longer a priority to my injection molding supplier.
If you answered “Yes” to any of these, it may be time to look for a new injection molding supplier.
Transferring your injection mold tooling to a new supplier can seem like a daunting task. We will be breaking it down step-by-step over the next few weeks to help simplify the process.
Check Your Pulse
When considering a mold tooling transfer, it’s important to get a good understanding of your current situation. The following are some questions to consider:
→ What is the overall “health” of your current molder?
→ When was the last time you had a good status meeting with your molder?
→ Where are your tools?
→ Do you actually own the tools?
→ What condition are your tools in?
These are all important things to consider as you evaluate your current part production situation.
The location of your molder may be a risk in itself. In 2020, global supply chains felt the pain of the worldwide pandemic. Many businesses chose to bring their molds and production closer to home in order to keep their supply chains moving as smoothly as possible.
Assess Risks
If you are considering transferring your molds —especially from a molder in another country — there are some important things to keep in mind in the earliest stages of the process.
- Wait to tell your current molder of your plans to move the mold. Some molders may lose the incentive to act in your best interest after learning that they will be losing your business. It is better to have everything in place at the new supplier before notifying your current molder.
- Build inventory with your current molder. This will ensure you have enough inventory to keep up with sales throughout the transfer process.
- Gather information about the mold, such as the 3D files for the mold’s design, injection parameters, type of plastic used, and any other information that will be helpful for your new supplier to get your project set up and running smoothly.
Mold Tooling Transfers with Selmax
As a full-service plastic injection molder, Selmax stands ready to assist you in the process of sourcing your plastic injection molding in the United States.
We have manufactured millions of American-made products since 1971 and are proud to provide our customers with the high-level attention of a small operation and the quality and capability of a large-scale operation. Our turnkey manufacturing solutions include part design, mold design, mold making, high and low volume parts manufacturing, assembly, and delivery.
To learn more about transferring your mold tooling to Selmax, contact us today!
More in this series:
Step 2: Finding the Right Molder
Step 3: Gathering Facts and Data
Step 4: Developing a Schedule
Step 5: Planning Your Inventory
Step 6: Showing Your Tools Some TLC
Step 7: Defining Success for Testing and Sampling
Step 8: Identifying Risks and Opportunities
Step 9: Planning for Production
Step 10: Evaluating Results

Learn How Reshoring Can Reduce Supply Chain Risks
COVID-19 has taken a toll on global supply chains, forcing many businesses to begin considering reshoring their operations. Manufacturers are especially affected, although the industrial sector as a whole has seen an increase in reshoring efforts.
According to Thomas Insights, “64% of manufacturers report they are likely to bring manufacturing production and sourcing back to North America — a 10% increase from the same sentiment reported in the March 2020 survey.”
So, what’s driving this trend?
Increasing Costs & Supply Chain Disruptions
Historically, utilizing manufacturing facilities offshore was a cost-reduction strategy. Over the past few years, however, shipping costs have risen and tariffs have been imposed on those importing from China. COVID-19 has only further complicated things by impacting the global supply chain with some borders completely closed off to non-essential trade.
Long Lead Times
Customers are demanding products faster than ever thanks to advancing technologies. One way to deliver products to the end customer faster is to bring operations closer to home and the customer. Reshoring means goods have to travel shorter distances to get into the hands of their distributors. This means a faster sales process, which can assist with predictability and forecasting.
Uncertainty
During these turbulent times, the global supply chain has reduced reliability. Companies are scrambling to reduce risks and protect their business. Reshoring operations is the preferred choice to increase stability and predictability and ensure that the supply chain remains strong.
Risks of International Outsourcing
Risk is part of being in business, but the goal of every business owner is to assess and minimize risks as much as possible. While many manufacturers choose to offshore for financial reasons, the risks involved with offshoring should be considered in that decision
According to Quality Magazine, data security is a large risk involved with offshoring. Proprietary designs could be leaked to competitors and other sensitive company information may also be at risk since standards of data security vary from country to country.
Where offshoring is concerned, countries such as China and India have been popular in the past due to their low hourly rates. However, with the recent increases in wages as well as increasing costs of transportation, offshoring is becoming less desirable from a cost-saving standpoint.
Companies often report that their supply chain is often slowed considerably with the implementation of offshore manufacturing. Increased shipping costs result in slower deliveries. Global events, such as the current pandemic, can cause further delays.
Even prior to the COVID-19 pandemic, imposing tariffs have made some offshore operations even more expensive than simply producing them “at home.”
The Future Is Bright
While it may be an uncertain time right now, the future is bright for U.S. manufacturers. During this pandemic, the world has seen the importance of manufacturers with many displaying their versatility by converting operations to produce supplies and PPE in response to the COVID-19 outbreak.
The pandemic has also shifted most companies’ risk management plans. While offshoring may return to normal within the next year, it may be deemed wiser to reshore as many operations as possible to prevent further disruption in the future.
The pandemic has highlighted the need for flexibility within the supply chain. Manufacturers will do well to reestablish their operations as locally as possible.
According to the Reshoring Initiative, reshoring“benefits manufacturing companies by reducing the total cost of their products, improving balance sheets, and making product innovations more effective.”
Reshoring With Selmax
Selmax Corporation has a long and successful history of helping U.S. companies effectively reshore their plastic injection molding operations. We can help with both tooling transfers and designing and manufacturing new molds.
We are ISO:9001 certified and take pride in our stringent quality standards that ensure our customers are getting exactly what they order, every time.
Are you ready to reshore your plastic injection molding projects? Contact us or request a quote.
4 Steps for a Smooth Mold Transfer
A guide to a seamless plastic injection mold transfer.
Many factors drive the decision to move forward with a mold transfer from one injection molder to another. It might be increasing costs, inconsistent quality, missed deadlines, or even a re-shoring effort for molds being run internationally. Perhaps there’s concern about the financial stability of the current molder and the necessity to avoid production interruptions.
“Mold transfers — particularly large ones — require upfront planning, communications, and investments to achieve the goals and expectations of the project,” (Berg, 2011). Regardless of the reason for transferring, here are four steps to be sure the process goes as smoothly as possible.
1. Gather information.
Once you’ve decided to transfer your mold(s), you should first find and review your contract with your current molder and have it ready to reference.
Ideally, you’ll have the 3D CAD files and 2D prints for the part design and mold design along with material specifications, injection molding processing parameters, and applicable quality control requirements.
This is a good time to visit the current molder to observe your mold running. Often, experienced operators will have specific shortcuts, tips, or tweaks to make the mold run efficiently. This information is invaluable in the transfer process because it can help the new molder get up and running faster.
2. Evaluate the new molder.
Investing time in due diligence is important because you’ll need to ensure the new molder has the capabilities and machine time to run your mold as often as needed. You should also look for molders that have plenty of experience dealing with mold transfers.
When meeting with the new molder, be prepared to provide the information collected during the “gather information” phase. In addition, let them know if you have any specific processing requirements, shipping or packaging requests, projected production volumes, post-production assembly needs or any other keys to success that are important to you, as the customer.
3. Build inventory.
After you’ve selected the new molder you’ll want to develop a transfer timeline. Based on this schedule you can determine how much inventory you will need to get you through the transfer, mold setup, and mold qualification at the new molder until normal production resumes. Many factors influence this timeline and you’ll want to have some reserve for any potential unexpected obstacles.
At this time, you should also collect a few parts to be used as “golden samples” for the new molder to reference when qualifying the molds at the new location.
4. Execute the Transfer.
After everything has been settled with the current molder and selection of the new molder is complete, it’s time to make the transfer.
Open communication with all parties involved will ensure the process moves along quickly. Make certain that both molders know the timeline, deadlines, and the roles they need to carry out to complete the milestones as needed.
The basic mold qualification process at the new molder includes:
- Tooling receipt, inspection and assessment to evaluate any maintenance or repairs needed on molds and associated gauges, fixtures, or post-processing equipment.
- Part Qualification to produce sample parts for comparison with provided “golden samples.”
- Production upon customer approval of the sample parts. At this point, production should be back to normal.
Selmax Mold Transfer Capabilities
Selmax has years of experience helping customers transfer their production molds from other molders (or in-house operations). We have experience with both domestic relocation and international “re-shoring” transfers. Production molds and tooling are often the single largest investment in a plastic injection molding project. Selmax can help you maximize your return on that investment.
Each tooling transfer project is assigned a Selmax Project Manager (PM) as the customer’s primary point of contact. The PM works with the customer through each phase of the mold transfer process. The PM also coordinates all the necessary activities with Selmax Logistics, Tooling Technicians/Machinist, Process Technicians, and Quality Assurance to ensure a smooth tooling transfer and an uninterrupted supply chain.
References:
Berg, John (2011). Eights Steps Toward a Seamless Mold Transfer. Plastics Technology. www.ptonline.com/articles/eight-steps-toward-a-seamless-mold-transfer


